Year 9 Hundertwasser: Watercolour experimentations

To begin the learning of how to use watercolour paints the students completed a sample image in their sketchbooks. The instructions were to replicate an area of the Hundertwasser paintings and colour match them with watercolour. The instruction to match the colours from the original work was not stressed enough and was lost to some pupils. I introduced testing colours in swatches on the page, this was demonstrated by the more able students in the classroom. This skill of watercolour was then applied to the 3D experimentation piece. A challenge of this task was using an appropriate amount of water while producing a strong colour similar to Hundertwasser’s work.

Picture1

Picture2
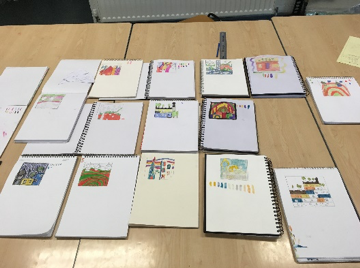
Use of colour swatches neatly presented under the work. Clear testing of colour and adjustments before adding into sample square.


Picture3

Matching colours from the Hundertwasser paintings. For future lessons students could include the actual image they are working from to show what the work is in their sketchbooks.


Picture4Lovely use of watercolour, clear understanding of how to manage the material. Clear lines in drawing helped to achieve a concise sample image.


Picture5Well drawn design from inspiration. Demonstration of concentration in neat watercolour painting. Achieved a bright colour with the watercolours which is appropriate for the subject matter.

Personal Journey of my PGCE

Journey of a teacher: The brief was to produce a piece of work that represents my personal journey in becoming a secondary teacher. This gave a lot of freedom as there was no restrictions or guidance in the media, size or format.

Picture1

I displayed my journey as a teacher through a concertina book following the key stage of my PGCE in frames. This idea stems from a gallery visit sectioning what I anticipate as the main parts of my progression over the coming year. I used a fine liner to accentuate the detail and small parts of pencil crayon to colour highlights in each frame.

Lino Printing Process

Lino Printing is a process that requires carving into a piece of Lino to produce a relief print. It is a form of block printing that gives work very crisp and exact lines. Depending on the design it can produce very simplistic and striking work or more detailed and textured art. Lino printing results in extreme contrast using two different colours or tones.

Stage 1: Design
A simplistic design can be cut straight into the Lino free hand. More complex compositions could be sketched out and replicated onto the Lino with a permanent or biro pen.

Stage 2: Carving
Using Lino cutting tools the design is carved out from the surface of the Lino. As this is a relief print the areas cut out will remain the colour or tone of the paper and retain only small portions of the ink.

Stage 3: Inking
Lino printing is done with water based inks. Using a roller it is applied to the Lino in an even thin layer, the amount of ink will alter the texture of the print. A smaller amount of ink will produce work with more stippling and a more prominent texture. Too much ink can seep into cut areas and loose definition of the lines. For water based inks allow twenty four hours to dry.

Example of relief Lino printing – by Rose Kerbyson

Softer Linoleum is easier to work with and carve into. However the standard tougher Lino will produce a crisper line in printing, this is more appropriate for detailed designs. To avoid redrawing a complex design, an alternative way to transfer it onto Lino is using a multi purpose adhesive remover. Place a photocopy of the design (ink side down) onto the Lino, then wipe over with the adhesive remover.

The Lino process can be pushed further through reduction printing. This involves layering prints with different colours or tones. Once the first Lino print is complete, carve further into the same Lino block. Print a second layer on top of the first image in a darker colour, taking care to line up the second print with the first. Any areas that are cut out for the second layer will remain the colour of the first print.